The fast-paced momentum of modern daily life often leaves us with very limited blocks of free time to dedicate to extensive, long-term home improvement endeavors. The prospect of starting a complex, multi-week renovation project can feel incredibly overwhelming, leading to procrastination and a stagnant living environment that fails to inspire your daily activities. Fortunately, interior design upgrades do not have to be long, exhausting marathons to be highly effective. Some of the most satisfying, high-impact, and aesthetically pleasing transformations can be executed from start to finish within a single day. Weekend DIY projects offer immediate psychological gratification, allowing you to wake up to a dull, uninspired space in the morning and fall asleep in a beautifully refreshed, stylish sanctuary that same night.

The secret to maximizing a single-day project is focusing entirely on high-visibility visual details and utilizing fast-drying, highly transformative materials. By targeting small structural features like interior doors, kitchen backsplashes, light switches, and built-in shelving units, you can alter the entire aesthetic narrative of a room in just a few hours. This comprehensive guide curates the absolute best single-day DIY projects, offering step-by-step guidance to help you unlock maximum style, luxury, and freshness across your living space with minimal time investment.
The High-Contrast Interior Door Transformation with Sophisticated Trim
Many people spend hours selecting the perfect wall paint colors, buying beautiful furniture, and hanging high-end artwork, while completely ignoring one of the most frequently repeated architectural features in their homes: the interior doors. Standard builder-grade interior doors are typically painted a generic, flat apartment white and feature cheap, circular silver knobs, which break up the visual flow of an otherwise stylish room. Transforming an interior door into a bold architectural statement is an exceptional single-day project that yields monumental luxury rewards.
Begin by removing the door handle hardware and placing a drop cloth underneath the work area. Use a high-quality interior paint in a rich, high-contrast dark tone like deep charcoal gray, midnight black, or a sophisticated navy blue with a satin or semi-gloss finish. Before applying the paint, use a strong wood glue to attach lightweight polyurethane picture frame molding strips to the flat face of the door, creating a classic two-panel or three-panel European design. Paint the entire door, including the new molding strips, uniformly to create a solid, custom-carved appearance. While the paint is drying, discard your old, cheap circular doorknob and replace it with a modern, heavy-duty matte black or satin brass lever handle with clean geometric lines. Once rehung, this single door transformation acts as a stunning, high-contrast anchor point that instantly elevates the perceived luxury status of the entire adjacent hallway or room.
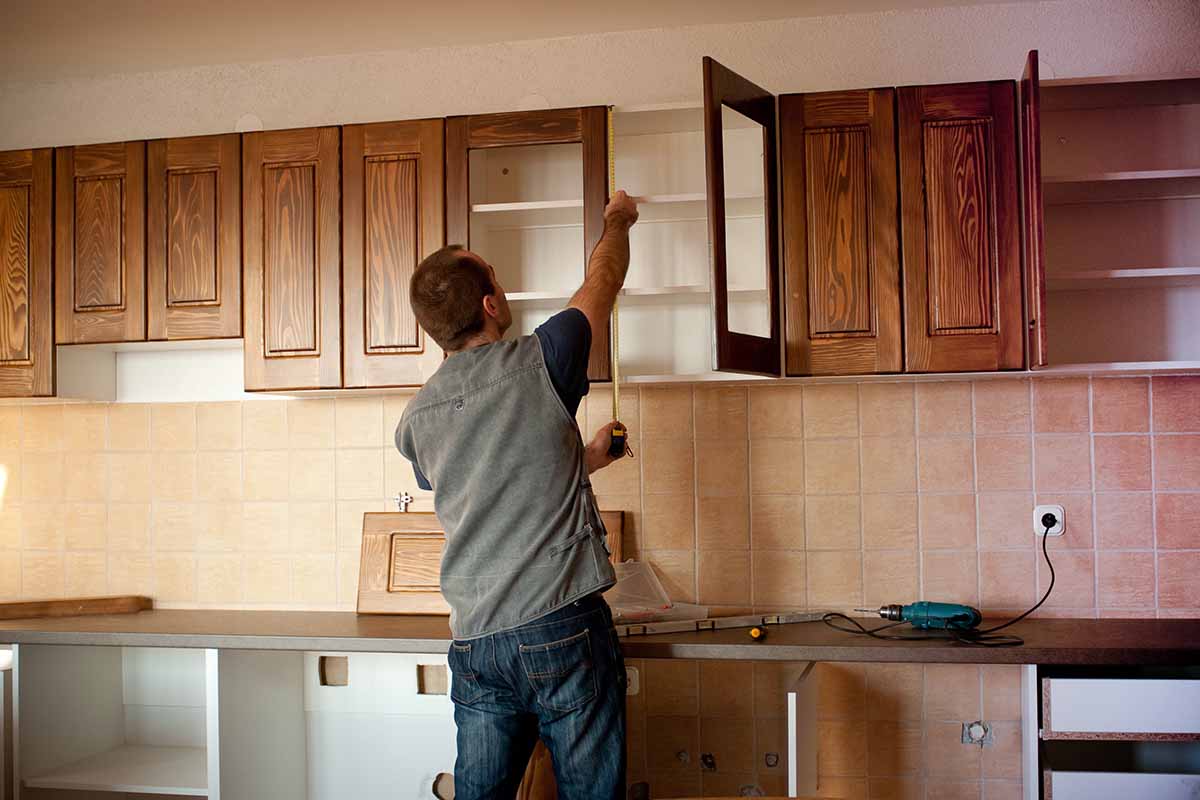
Installing a Modern Faux-Tile Backsplash using Premium Peel and Stick Materials
The backsplash zone of a kitchen or bathroom vanity is a highly visible focal point that heavily dictates the modern status of the entire room. Traditional tile installation requires messy mortar mixing, ceramic tile wet saws, grout sealing, and days of curing time, making it an impractical choice for a quick weekend project. However, the modern manufacturing of premium, heavy-duty peel-and-stick tiles has completely revolutionized this design boundary, allowing you to achieve a professional, waterproof, and visually stunning backsplash look in just a few hours of careful installation.
To ensure long-term success, use a high-quality degreasing cleaner to scrub the wall surface behind your sink or countertop completely clean, removing any residual oil or cooking splatters, and wipe the area dry with a microfiber cloth. Select a design-forward peel-and-stick tile made from thick, three-dimensional composite materials that mimic the exact weight, texture, and light reflection of real glazed ceramic or natural stone, such as a classic white herringbone or a modern gray subway tile pattern. Using a sharp utility knife and a metal straightedge ruler, measure and cut your tile sheets to fit around electrical outlets and corner transitions. Peel off the protective backing paper and press the tile sheet firmly onto the wall, working systematically from one side to the other. The advanced adhesive cures instantly upon pressure, providing a beautiful, durable, and easily cleanable surface that modernizes your culinary space instantly before dinner time.
Upgrading Open Bookshelves with Custom Textured Wallpaper Backings
Open bookshelves and built-in display cases are phenomenal tools for storage, but when the back walls of the shelves are painted the same color as the surrounding room, the display can look flat, cluttered, and uninspired. A brilliant, low-cost single-day project that introduces an unexpected layer of luxury pattern and designer depth to your shelving units is installing a custom textured or patterned wallpaper backing inside the shelf alcoves.
Remove all books and decorative items from the shelves, and remove the individual floating shelves if your unit allows it. Purchase a roll of high-quality peel-and-stick removable wallpaper featuring a subtle, sophisticated design, such as a gold metallic geometric line pattern, a textured grasscloth weave, or a moody vintage botanical print. Measure the interior back panels of your bookshelf precisely using a tape measure, and cut the wallpaper sheets to match those dimensions, paying close attention to pattern alignment between sheets. Carefully peel back the top edge of the adhesive paper, align it perfectly with the top corners of the shelf back, and smooth it downward using a plastic smoothing tool or a clean squeegee to eliminate any trapped air bubbles. Reinstall your shelves and curate your books and decorative objects back into place, leaving deliberate open gaps to let the gorgeous new wallpaper design shine through, creating a rich, multi-dimensional gallery look that transforms the entire room.